
When you’re renovating your house, the first thing that comes to your mind is painting the walls. This is the initial step to ensure that your house has a completely new and different look. But this is a difficult job as you have to clean the walls before you start painting. This can be tricky when you don’t exactly know how to clean walls before painting. Well, let’s find out.
There is no specific method to clean walls before painting. You can wash your walls using warm water and a sponge. If your walls have stubborn grime that won’t just come off, you can use a detergent that cuts off grease, mixed with water. Avoid scrubbing too hard and exposing your wall to excess moisture, as this will ruin the condition of your wall.
Cleaning walls may seem like an inconvenient chore, but it helps give your wall a smooth finish when you’re done painting it. But is it possible to skip washing walls before painting at times? Keep reading the full article to find out. This article will also cover what you need to know about prepping walls before painting, which chemicals you can use to clean walls, and what happens when you don’t wash walls before painting.
Preparing Walls Before Painting
Even though you can start painting right away, it is better to prep your wall before you do so. The consequences of not washing the walls before painting may not be seen right away, but you can slowly start to see why this step is necessary for the long run. Below are the steps listed that you need to know to prep your walls before you begin painting.
Wash The Walls

To wash your walls, you can fill a bucket with warm water and soap or TSP solution. Add a proportionate amount of the soap so it is not excessive compared to the water. Dip a large sponge into the mixture and take it out when it has completely soaked in the solution. Squeeze out the excess water to make sure the sponge is not fully wet as it can dampen the wall, ruining it.
Soak the sponge for only a few minutes and scrub the wall. Wring the sponge frequently in another bucket to get rid of the dirt and soak it in the water again. Make sure to not scrub too hard and avoid water dripping from the sponge as well. Dry your wall thoroughly with a damp towel before going on to the next step.
Removing Mildew
If your walls have mildew, always make sure to remove them. If you paint over it, then mildew will grow over the paint, which will make cleaning much more difficult the next time around. You can clean mildew with a solution that contains one to four parts bleach and the remaining water.
Apply the solution to the affected area of the walls and wait for a few minutes to let it set. Scrub the area with a brush with soft bristles and rinse it with clean water afterward. If you’re cleaning the corner of the walls, make sure to wear goggles to avoid getting the solution in your eyes as it is very harmful. Let your wall dry for a few hours after.
Sand Surfaces

Once you’ve cleaned the walls, sand the surface of the walls so that you can carry out the painting smoothly. This removes any rough spots on the wall. You can use a small piece of sandpaper to only smooth out the uneven surfaces. Wipe away the dust residue left on the surface with a damp cloth and then leave it to dry.
Cracks on earlier painted surfaces can also be an issue. This can result from poor preparation of the surface of the wall before painting. Painting before smoothing out the surface is not a good idea. Thus, you will need to remove any cracks by sanding prior to repainting.
Priming Walls
Primer is the elementary base before you begin painting and is very necessary. If your walls have pores or stains, a primer will help cover them up. It hides any defects, giving your walls a smooth look and a perfect finish after painting.
You need to use an alcohol-based primer to lessen the strong smell of the paint. Although you might be intrigued to skip this step, priming the walls is vital. You cannot rid the walls of grime completely as there will still be a little oily substance left. If you paint directly over them without using a primer first, you will soon need to repaint as dirt will start showing shortly again.
What Are Safe Chemicals To Use When Cleaning Walls?
When it comes to cleaning walls, you don’t need very strong chemicals at all. You can simply use warm water and soap to get rid of any dirt accumulated on the wall. If it doesn’t do its work very well, you can also add a few drops of distilled white vinegar to warm water. The substances present in vinegar can remove any stain or dirt easily.
However, if your wall has stubborn stains that don’t work with any of the previous solutions, you can use baking soda instead. This works well with any stain and so, can get rid of stains from walls. Fill a bucket with about a quarter of a cup of baking soda and then fill the rest with warm water. Dip a clean cloth in the solution and apply it to the wall. Use a towel to dry it after.
Oftentimes, even baking soda may not work. At this time, you can use TSP (trisodium phosphate). This is a very strong wall cleaner and can be used if baking soda or soap doesn’t remove the stains perfectly. Add the same amount of TSP as baking soda to a gallon of hot water and apply it to the wall with a sponge. Take another bucket of clear, hot water to remove the cleaner from the surface.
How To Wash Walls With Soap And Water?
If you don’t want to spend your money on bleach or chemical cleaners, you can simply opt for a normal grease-cutting detergent. This will remove unnecessary grease and grime from the walls, making them smooth enough to repaint. However, cleaning with soap and water may not be as simple as it sounds.
There are a few steps involved to get the perfect finish, which are listed down below.
Removing Big Stuff
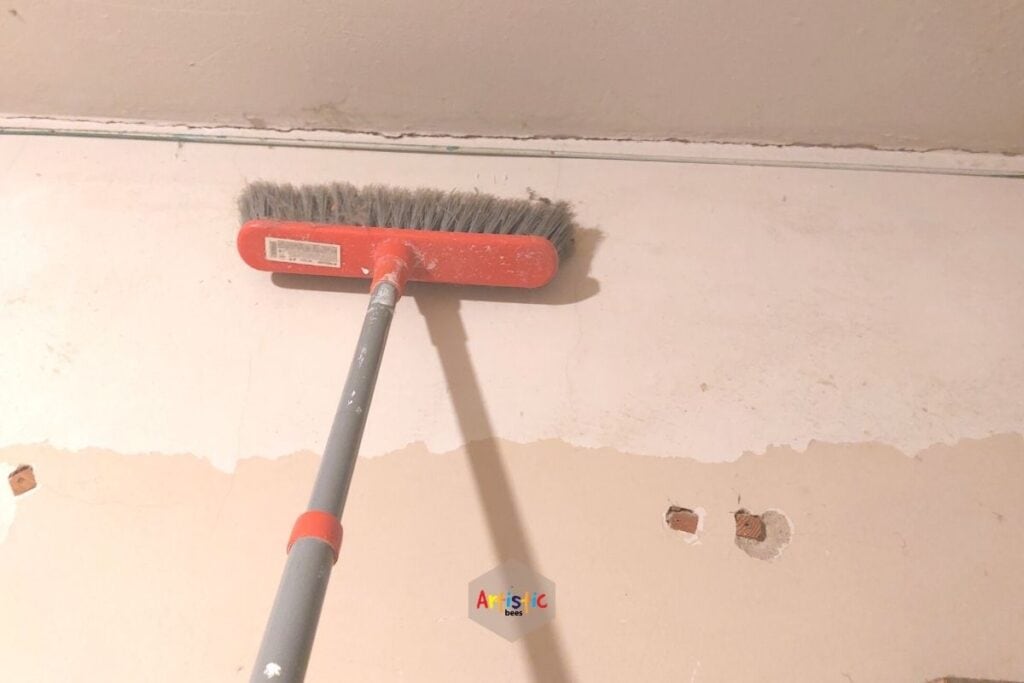
You can remove the dust particles and cobwebs in the nooks and corners with a broom. This will make it easier for you to clean afterward.
If you start using soap and water right away, the water mixed with dust can make it even messier. The dust may even stick to your wall, making your whole cleaning process much lengthier.
Clean Trims And Baseboards
Baseboards and the tops of doors and window trims have a lot of dust accumulated on them. You can remove it using a piece of cloth that is slightly moistened.
This will help you stick the painter’s tape firmly. If you don’t remove the dust before doing so, the tape will come off and paint will go everywhere, ruining doors and windows.
Vacuum And Wipe

You can use the bristle attachment of the vacuum to clean the areas close to the walls. Vacuuming will remove any persistent dust that can’t be removed with a broom.
Finally, you can use soap and warm water to clean stains on the wall. Mix a small proportion of soap with warm water and wipe down all the surfaces that you will paint and have stains on them. If you’re going to repaint the whole wall, it is better to clean all of it to avoid any hassle later on. Using a damp sponge works best for this job.
Rinse And Dry
After you’ve cleaned the walls and all the stains seem to have faded, rinse your wall with a new and clean, damp sponge and clear water. You can also use a cloth for this process.
Let the wall dry completely afterward for a few hours before putting paint on it. If you don’t do so, the wall will not get a chance to dry after you’ve put paint on it. It will remain wet and the paint will come off soon, causing you to get a repaint soon after.
When To Wash Walls With TSP?
TSP is an inorganic powder that, when mixed with water, creates an alkaline cleaning solution. This solution is an outstanding dissolvent of grease and oils. This is especially used in kitchen walls, as they gather the most greasy grime. You can clear the dirt with basic soap and water, but it is best to use TSP for the leftover oil on the walls.
You can also use TSP in bathroom areas as the walls contain soap scum or a good amount of misted sprays as these are very hard to get rid of. If you have a small kid at home, you already know there’s a lot of hard work you have to go through to clean the walls. But don’t worry! TSP can also remove non-soluble markings off the wall such as crayons.
You have to mix the TSP powder with warm water and wash the walls with a wet sponge soaked and squeezed in the solution. To make it easier, you can work in sections instead of going for the whole wall at once.
Let the solution sit in each section for about two minutes and then scrub with the sponge again. Rinse instantly later on with clear water and a cloth, as too much alkaline can ruin the condition of your walls.
If you want your house to have a matte finish, TSP works well with that as well. It etches the surface, so it somewhat helps dull excessive-gloss paint surfaces. It can also work as a replacement for sanding, so you won’t have to do extra work.
However, as this solution is alkaline, you need to be very careful as it can stain walls and floors. Wearing rubber gloves and goggles is advised to protect yourself.
When Can You Skip Washing Walls Before Painting?
Washing the walls before painting may be an absolute necessity, but you can skip it sometimes. That’s right! If your walls don’t have grease stains or excessive dust present, you can omit this step. At that point, it is unnecessary and a waste of money to wash the walls that are already stain-free.
If you don’t have any kids at home who will stain the walls or a wood-burning fireplace, then you can also skip washing walls. The smoke from the fire creates a dark stain on the walls which then needs to be removed by washing with TSP solution or baking soda. On the contrary, certain walls may need even heavier cleaning.
Other than that, it is still best to at least dust the surface with a broom to remove dirt. It is very rare that the walls will have any stains on them, so, you can use soap and water to wipe only the areas that are stained instead of the whole wall. This makes your job much easier.
What Happens When You Skip Prepping And Washing Walls Before Painting?
Most professional painters skip washing walls and head straight to painting. You might think that your wall looks clean, so why take the trouble to clean it? Well, this is where you’re wrong. Even though you’re going to eventually cover the walls with paint, the consequences of not washing will start showing a few days later, which is why professional cleaners spend so much time cleaning and repairing the walls. So, what really happens if you skip this step?
Paint Needs Something To Stick To
You can paint the chipped walls with cracks and stains but don’t expect it to last for long as, although it might save your time in the short term, you will have to work much harder in the long run. If you want your new paint to stick, the walls need to be clean beforehand.
Dust can prevent the paint from adhering to the walls. In addition, you also need to put down a few coats of primer and scrape the walls of any chipped paint. If you don’t remove damaged paint, your new paint will start to look just the same.
Dirt Can ruin New Paint
When it comes to exterior painting, giving the surfaces a strong cleansing is extremely vital. Exterior walls gather the most dirt as they are exposed to the outside environment, although they may still look clean at times, especially if you have dark-colored walls.
A power washer can get rid of the dust gathered on the walls. However, it is still no alternative to hand scraping. If you miss out on either of the steps, you will soon end up with clean flaking paint that looks much worse than your previous paint job.
Repairs Do A Lot More Work Than You Think
Repairing walls is just as necessary as washing them. Filling cracks in the walls may not seem as important as it seems, as even though they can be covered with paint, the cracks will eventually show through within just a few months of painting.
Moreover, defects in the wall hinder the paint’s ability to stick smoothly to the surface. You must also keep an eye out for rusty metal or rot, as they can lead to blisters and mildew growing on the surface. Rotting must be addressed before putting a brush to the wall so that you can achieve durable and amazing results.
Quality Primer Does A Lot Of Work
A primer is important, especially when you are making a dramatic change to the exterior and interior walls of your house. Not only that but just like washing, primer also helps give the paint the ability to stick to the wall.
There are specific primers that are designed to seal the surface of the wall, covering the imperfections. If not, they might cause discoloration of the paint, making your house look dull in no time. In addition, if you want to change the look of your house by shifting to bold color, you can use tinted primers as they make the transition much easier.
Conclusion
Now that you know how to clean walls before painting, you should not face any trouble while going to wash them. They are very easy to wash, especially the interior, as they have very few stains on them.
If, however, you’re going to clean the exterior walls, it will consume a bit more of your time and energy. But there is nothing to worry about as there is nothing a power washer and TSP can’t fix. It is still best to get professional help if you’re willing to spend that extra money. Thanks for reading the full article. Hope your paint job goes smoothly so that your home can look as good as new!


