
When beginners take an interest in acrylic painting, it can quickly become confusing. And why wouldn’t it be? All the paint choices, brushes, color palettes, and surfaces are already so overwhelming! It’s natural to find it a bit strange if you’re used to watercolors or oils. Don’t worry because we are here to give you a complete acrylic painting tutorial.
The first thing beginners need is a good selection of colors to mix and experiment with. You should have brushes of various shapes and sizes in your arsenal. Acrylics dry up quickly, so make every stroke count. Always try to choose artist quality paint over student quality for better results. Beginners need to get used to looking after their acrylic painting materials.
So, is that all you need to know before starting your acrylic painting journey? Nope, there’s more! Many different schools of thought come into play when you are getting into this hobby. What types of colors and brushes do you need? Or how would you prepare yourself before painting? Without further ado, let’s pick up our brush and dive into this topic!
How To Start Acrylic Painting For Beginners? Tutorial Guide
The basics of painting are the same in all mediums. What separates them all are the different techniques. You will find it easier to get around the ropes of acrylic painting.
We all know acrylic painting gets a negative rep since it is less popular than oils. This is because all of the masters mostly used oils. However, as the saying goes, try not to judge a book by its cover. Here’s an acrylic painting tutorial guide for beginners.
1. Every Stroke Counts
Unlike oil, you have so much time to get the paint wet and reactive on your canvas. When it comes to acrylics, time is of the essence. You would have to work against the clock, leaving little time on your hands.
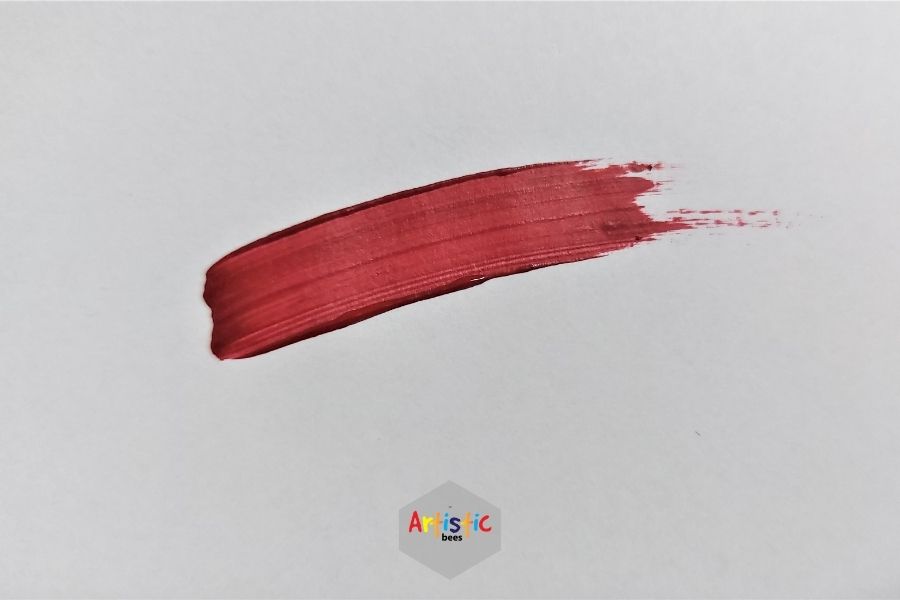
However, it could also be a blessing in disguise, as you would not have to wait before painting another layer on layer. All you need to do is make sure that every stroke is willful and decisive.
Remember that this is not an oil painting. In short, you will not have as much freedom as you have with oil. Make every stroke count.
If you’re still having trouble with acrylics drying too quickly, try mixing in a medium with your colors to slow down the drying period.
2. Mix Your Paint Properly
Have you ever seen a professional artist as he worked his magic? If so, you must have noticed that they seem to spend more time fiddling around on their palettes combining colors than actually painting.
This is due to the fact that mixing colors is one of the most vital factors that will define a painting. So, before you put your brush on the canvas, be sure to make up your mind about choices of colors.
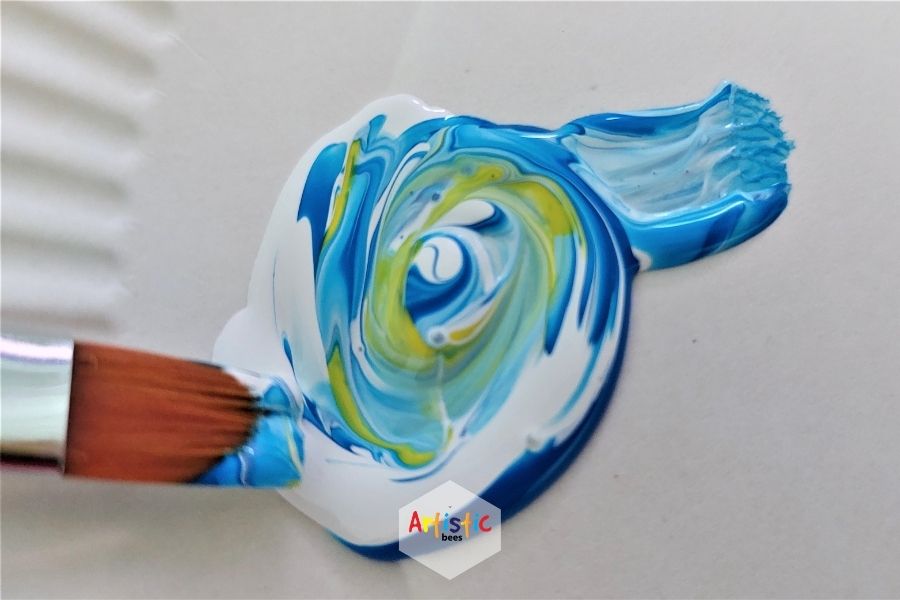
Don’t use your canvas, but your palette for color mixing and experimenting. Because time will not be on your side when experimenting on the canvas. As we mentioned earlier, acrylics dry quicker than oils.
3. Acrylic Paint Will Darken As It Dries
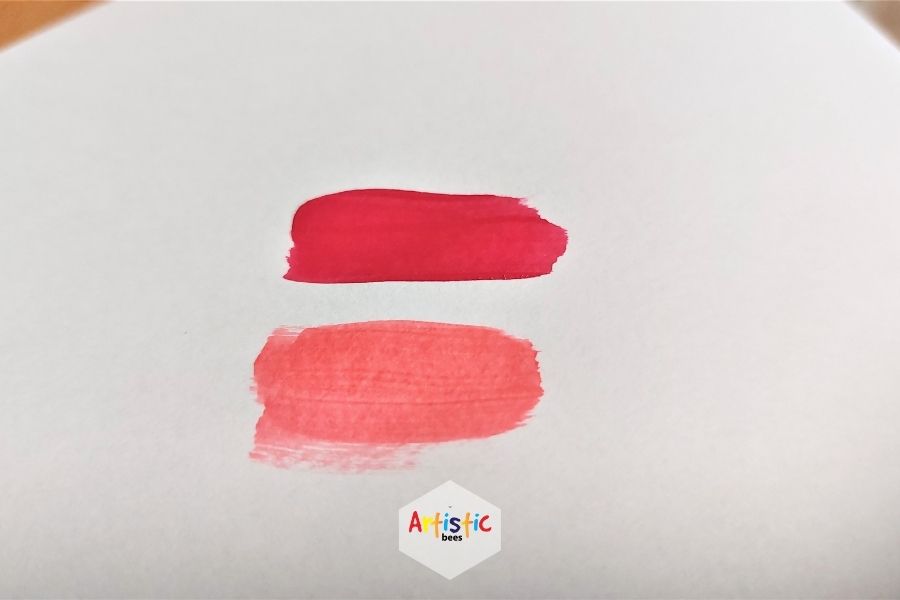
Acrylic paints have a tendency to darken as they dry, which is something you will notice with most of them. It often comes as a surprise to beginners, as they have never worked with any.
What you can do is chill for a bit after mixing your colors. As time passes, it will allow them to darken a tad bit while you wait. The brighter colors appear to have more of this darkening aftermath than the darker ones.
4. Try To Use Artist Quality Acrylic Paint
Even though you may be held back by a limited budget, investing in high-quality materials will save you money in the long run. A better quality product may cost a few extra dimes out of your pocket, but at least the colors would not fade.
Moreover, your final work of original art’s value will tremendously increase. This is especially necessary if you wish to sell your artwork.
Look for the label ‘Artist Quality’ instead of ‘Student Quality’ when paint shopping. Unless you are dealing with a tight budget, then you should start with high-quality paint brushes.
Scrape whatever pennies and dimes are leftover to buy artist-quality paint and canvas. To save money for a rainy day, we recommend beginners start learning with only a few colors: blue, yellow, red, and burnt umber.
5. Take Proper Care Of Your Painting Materials
We know spending almost an hour cleaning brush after brush can be a real pain in the neck. It quickly gets on your nerves when you are painting daily.
Now, what you can do is dip the tips of your brushes in a basin of water while keeping them as flat as possible. Don’t drown the whole thing. As long as you keep the bristles unfolded, you should be fine.

Once you are in the mood to paint again after some time, you can go ahead and take the brushes out of the water. Of course, you will need to dry them with a clean cloth before using them.
6. Choose Larger Brush For Acrylic Painting
Having large brushes in your arsenal can prove to be quite handy! Not only does it increase your brushwork efficiency and force you to be decisive about your strokes, but it also makes covering a canvas easier.
Many newbies switching to acrylic painting using smaller brushes will result in more delicate and realistic artworks. But, don’t let the opinion of sheep get to you.
Why not? Because even the most experienced artists used brushes that were much larger than you might expect, and when it comes to art, you only learn from the best. Try to follow what the experts have to say.
7. Do Not Use Dirty Brushes
Even though you may call it a day as soon as you finish a painting, it’s worth mentioning that you should always clean your brushes afterward. Any dry acrylic that gets stuck in your brushes will decrease their lifespan dramatically. For this reason, it is critical to thoroughly go through every single brush and clean them after every art session.
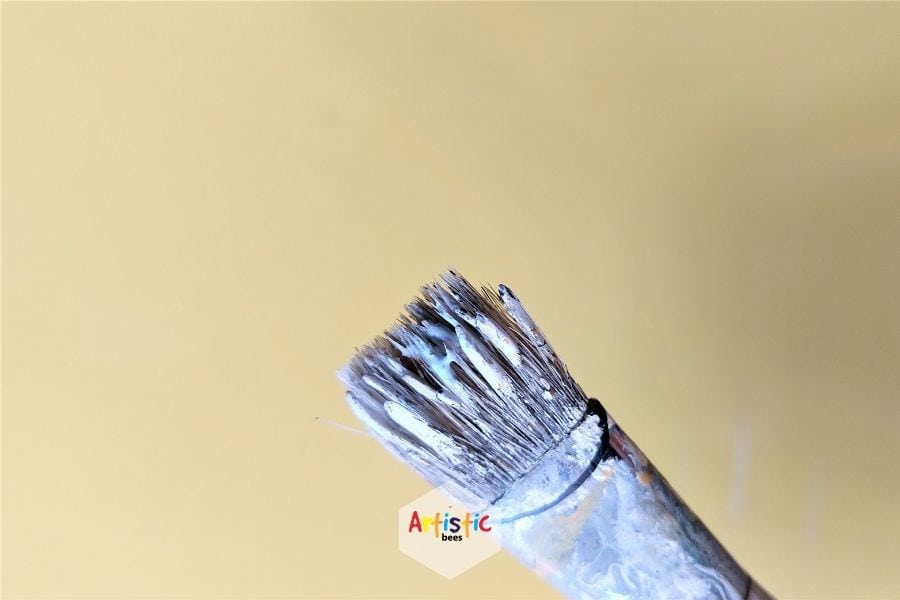
Once the acrylics have dried up, they essentially develop a plastic film. Eventually, they harden up as time goes on. Eventually, they harden up as time goes on, and you would have to deal with dried-up paint, which can be a massive headache to remove the debris.
8. Stain The Canvas
A beginner might find painting on a stained canvas much easier than staring at a blank white canvas. It will help them to paint a picture in their mind first. The stain should have a light tone to it. You don’t want to deal with a stain that’s too bold and vibrant, trust me.
You can start with something light like yellow, tone it down with a bit of blue. Mix it well before washing it all over the canvas with a lot of water. Furthermore, a stained canvas will help you find a starting point when judging your painting’s value and tones.
It will also make painting dark tones on the canvas a little safer. It’s common knowledge that throwing darker colors directly on a white canvas can be a risky business.
9. Go Easy On The Paints
Finally, try to go easy when squeezing paint tubes regardless of how big your project is. Every beginner makes these rookie mistakes. So, think about how much you would actually need and then sort it out at regular intervals.
Despite the fact that stay-wet palettes keep your mixtures fresh, it’s smart to only squeeze out as much color as you need to avoid wasting. Don’t forget that artist-quality acrylics cost a fortune. Every single drop matters!
Types Of Paint Are Right For Acrylic Painting
Acrylics come in many different brands. However, that does not mean all paint is the same! So, it’s necessary to understand the variations between the many types of acrylics before deciding on a particular brand or make.
With that cleared, there are two main types of acrylics: artist quality and student quality.
Artist Quality Acrylic Paint
Generally speaking, artist-quality acrylics usually have a higher concentration of single pigment colors. They will also have fewer extenders and additives. This is great because the more colors you use, the more likely your mixtures will turn muddy, flat, and lifeless.
Single pigment colors are more popular for creating clean and clear color combinations. Artist quality paints are also better in highlighting the unique qualities of every color to blossom through.
As a result, some colors will dry to a different finish. It makes things easier for professional artists as they desire to have different textures. It also brings different levels of opacity when acrylic painting.
Isn’t it pretty obvious that a better and higher concentration of pigment will be more costly? You know what they say, high-quality products seem to come at a hefty price.
For all the fancy artists out there, here are some handpicked brands that live up to the hype!
- Winsor & Newton Professional Acrylics
- Golden Artists’ Acrylic Color
- Spectrum Spectracryl Artists Acrylic
Student Quality Acrylic Paint
Student grade acrylics are the average-priced ones you can buy. These are more affordable choices since the pigments used are less costly than the expensive alternatives. Consequently, they contain higher levels of extenders and additives.
To give you an idea, pigments in the higher series like Cobalt and Cadmium typically come at a high price in artist quality paints. But, in student ranges, you will notice that they are substituted with ‘hues.’ For example, Cobalt Blue Hue and Cadmium Red Hue.
What is the difference? Cobalt Blue is made up of just one pigment, while Cobalt Blue Hue is made up of three!
Most student ranges also include additives, seeing that they help to dry up colors with the same finish and texture. If you’re a beginner, you will appreciate this. Why? Because you would not have to worry about the shine or handling any variations.
Here are a few top brands that belong to the student quality group:
- Daler Rowney System 3 Acrylic Paint
- Winsor & Newton Galeria Acrylic Paint
- Sennelier Abstract Acrylic Paint
Don’t stress about your paintings looking cheap since these replacements exhibit almost similar qualities and colors to genuine pigments. Except you would enjoy the luxuries without having to pay an expensive sum.
Picking The Selection Of Colors
After you have decided on the paint you want to buy, you will need to think of the palette of colors you want to use. If you are just kicking off, buying a set can be a decent idea.
In most cases, these provide enough mixing colors to begin with. Some even come with a few extras if you are lucky.
There are some excellent acrylic painting sets to choose from. These collections come with a combination of primaries and a secondary or two. You need to look for the ones that include shades that come only in high-end sets.
If you feel like going rogue and buying your own colors, you are free to do so. Artists are certainly not caged birds, to say the least! Typically, one or two variants of each basic color will do. A green for versatility and some earth tones, along with the standard black and white, should be a must.
What Types Of Brushes Should You Use For Acrylic Painting?
The brushes you pick are purely a matter of painting style and personal preference. So, before you go out on a limb and order a luxurious set of brushes, there are a few things to think about.
Short Handled And Long Handled Brushes
There are two types of handles when you’re acrylic painting:
Short handle brushes: These are the ideal choice of weapon when working on small-scale projects or fine details. Due to the short handles, you can work considerably closer to your canvas. This makes small finishing touches seem like a breeze. For acrylic painters who fancy a crisp, detailed technique, small handled brushes are the best option.
Long handle brushes: Artists who are more comfortable with the distance between the canvas and themselves to draw bold, expressive strokes love these. A brush with a long handle is ideal for creating a loose, expressive painting approach.
Although keep in mind that the length of the handle will also make it difficult to get near your canvas, making these brushes unfit for fine detail painting. These brushes are more about making it easy to come up with quick, impromptu composition ideas on a broad scale.
Natural Hair And Synthetic Brushes
Acrylic works well with both natural hair and synthetic brushes. For those who are dealing with heavy body colors a lot, a natural hog bristle or strong synthetic hair might make things simpler.
For the firmness of the hair, working with acrylics and applying it to the canvas is so much easier. Hair’s stiffness may lessen over time as it is regularly used.

Note that water softens the bristles. So, try not leaving your brushes in water for too long, or else it will not be long before their days are numbered.
With springy natural hairs and softer synthetics, soft body colors and inks are more ideal to use. Not to mention, synthetic fibers last longer.
This means they can go through far more abuse than natural ones. While natural hairs will make it easier for you to paint, synthetic ones will be more cost-friendly.
Shapes Of Brushes
Brushes come in all kinds of sizes and shapes. Your choice of brush heavily depends on what kind of acrylic painting you want.
Round: The standard round brush is probably the most commonly used. For detailed work, these brushes have a round profile that curves to a point. And for covering more ground, the larger round sizes make more sense.
Short Flat: A short flat is what you call a “bright” brush. These end with a square edge, which makes them very useful for covering large areas quickly. Plus, it’s best to use short flats when your painting involves angular, geometric shapes.
Long Flat: A Long Flat has a little more length to it than a short flat. However, the stroke is barely any different.
Filbert: Filbert brushes have a gently rounded, flat shape, which makes them ideal for color blending and acrylic painting. It’s especially used when doing projects involving flowers.
Rigger: These brushes are not much different from a round brush. However, their fibers are significantly longer. Such long, thin brushes are best suited for painting continuous line work, such as ship rigging. Hence, this is where their name comes from.
Other notable unique shapes are excellent for their own specific purposes. For glazing and varnishing, there are larger flat brushes. And then there are fan brushes that are also used for blending.
Cleaning Your Brushes
Acrylics have the beauty of being easy to clean. In fact, it is much easier to clean than oil paint. You will need nothing more than a bowl of soap and warm water. To make sure that all paint debris is removed, keep washing your brush until the water is as clear as day.
However, you should be aware of leaving your brushes in water for too long. Leaving them unattended in the water tip down for a long period could cause the hairs to spread and get all messed up.
Reshape the tip and dry horizontally right after cleaning it. It can be quite unnerving. But, if you make it a habit to do this after each session, your brushes will last till the end of time.
How To Choose Your Color Palette?
Before settling on a random plate, understand how to choose your palette. After all, how well your colors are mixed will change the outcome of your project.
- Non-stick Surface A decent acrylic painting palette is any non-stick surface where you can separate and mix colors with ease. It makes zero difference whether you use a tray from your china or a large plate. As long as it has a non-stick surface, it will do the job.
- Wide And Spacious: If you are working with a good number of colors, you might want to use a broad, flat palette. Such wide palettes give you more room to work with, making them excellent for mixing large patches of color combinations. Additionally, you would not have to keep switching constantly between trays.
- Palettes With Wells: When you are using paints that have a lesser viscosity, a palette with wells will come in handy. The large flat ones with low viscosity often result in a huge mess. You will find it difficult to keep the fluids from running into each other.
Worst case scenario, the mixtures spilling off the palette! This is where wells come into play as they will contain your inks and separate them from one another.
- Stay-wet Palettes: Professional acrylic paints choose to use stay-wet palettes because they keep the paints fresh longer. These palettes include an airtight seal that protects the colors from drying out. They usually come with a sponge layer that raises the humidity level in the palette when wet.
- Disposable Palettes: A full-size palette may be too bulky for painting out and about. Especially when you are in the open air or in the classroom. Situations like these need disposable tear-off palettes. These single-use ones are made of resistant parchment film that you can throw away after each usage.
Basic Preparing For Your Acrylic Painting
Before you pick up the brush, there are a few things that you need to know. You can’t just walk willy-nilly into the room, take the brush and start stroking away. You should make some basic preparation first to make the best out of your painting experience.
Prepare Your Work Space
When you are just getting started on your acrylic painting, make sure you have enough free space. The scale you use will be down to your personal preference. Also, appropriate lighting should go hand in hand with the room.
A large, empty canvas can be a silent killer of a beginner’s motivation. A blank white sheet staring at you is not only intimidating but also difficult to start working with. So, a smaller scale should be more welcoming for beginners.
However, once you have tasted the waters, working on a larger scale might feel liberating with the right space. Everyone would love the luxury of a big studio.
But only so many can afford such a luxury. At the end of the day, we are artists and have to work with what we’ve got.
Painting Surface
The most commonly used surface is stretched canvas. If you are a painter and haven’t heard of these, you must have been living under a rock. Stretched canvas surfaces have been around for a long time now – and rightfully so!
They ensure your paint lasts as long as time does. However, they can be quite big for beginners to handle.
Modern artists have a lot more options when it comes to the types of surfaces they can work on. So, you might want to work on canvas boards or painting panels if a stretched canvas isn’t your cup of tea.
These have significantly thinner surfaces. In addition to that, they are much easier to store and take up less space.
Varnish Your Finished Painting
Applying a final coat of varnish to your acrylic painting is the perfect finishing touch. Varnish adds a tough coating of protection to your painting, making it more resistant to damage.
Sometimes, professional artists apply an isolation coat between the varnish layer and the painting. They do this as it allows the varnish to be removed for cleaning without causing harm to the paint layer underneath.
Such circumstances call for you to use temporary, removable varnish. You can use Soluvar, for instance. Whether or not you apply an isolation layer, it is necessary to let your painting dry completely before varnishing it.
As mentioned earlier, acrylic paint dries quickly, although thicker coats may take longer. Depending on the thickness of the coating, it is typically best to wait between 72 hours and 14 days. If you are going to apply more than one layer, make sure the first one fully dries before adding the next.
Conclusion
Once you start to get the hang of it, you will start falling in love with acrylic paint. It mostly depends on how you use your colors, brushes, palettes, and your working area. Even when things might not seem to be going your way, give that creative brain of yours a breather.
If you were searching for an acrylic painting tutorial, we believe this guide has been enough to kick-start your journey. As always, thank you for reading and have fun painting!


